Sunday, December 11, 2011

Extrusion success!!1! well, almost

I finally got some PLA to appear from the nozzle of my long awaited Sumpod.  It´s not much to look at but it proves that I can get plastic out of that thing.  But there are a few caveats still apart from the underwhelming amount extruded :)

I could not get the tip above 190°C with out shutting down the fan.  I did so for just a moment to get to 196°C.  I did not want to run it for much longer fearing that I will clog the whole this as other Sumpodders have experienced when running with the fan on.  It seem like I need a few degrees more with the PLA filament I have to get this working properly.  Another thing was that I fed the filament my hand through the teflon tube.

There are a few tricks I can try when I give it a go next time as it's to late right now for me to bother with any bravery.

1. Add more insulation
This will currently entail adding a bunch more kapton tape to the hot end.  I have 6mm roll I use for job. That should give me a bit more head room.
The long term plant is to use some fancy NASA tech in the form of an aerogel based insulation blanket called Pyrogel.  Which incidentally arrived on Friday.  That is a very dusty material with very fine particles aside from being quite expensive so I won't be doing that in a rush.  It will also be quite permanent after I seal as I'd rather not have dust spreading.

2. Regulate the fan
The extruder fan is running non stop on 12V and if I run it down a notch to decrease the amount of heat it's dissipating from the hot end.  I have a few options here and the simplest being to add a pot temporarily while I test the effect.  More fancy solution would be to add PWM to the firmware but I'd like to avoid that if possible.

That it for now


Sunday, November 27, 2011

PCB etching in 30 minutes

Here is a very interesting PCB etching guide that is perfect for rapid prototyping.  I like how sparse the material usage is by using a sponge to apply the ferric chloride etchant and home much control you gain.  If my planned PCB milling adventures go nowhere (doesn't start well with the post office loosing my package of PCB engraving bits) this is what I´ll try next.  Heck, I might do it anyway since it's so quick.  Wonder how easy it is to do double sided boards with this technique.

Friday, November 11, 2011

The arrival of the Sumpod

It's finally here. I'll be posting more about my unpacking and assembly experience soon. For now you'll just have to admire the smaller than expected box of wonders.

I have already secured some primer and paint.  The color scheme will be white internals and navy blue externals. The paints are local brands.

This should keep me busy during the weekend :D


Friday, October 28, 2011

Tracking numbers are here

Finally have a tracking number for my Sumpod unit.  It has taken a long time but the unit should hopefully be her after the weekend.  Will be hunting for some MDF primer and paint this weekend.  Interesting times ahead.

Monday, October 3, 2011

Charge of the SUMPOD

The first unboxing of a SUMPOD has been documented by fixer in his new blog.  He posts very detailed RAMPS 1.3 instructions and some useful hints if you intend to expand functionality.  Also plenty of photos of the MDF frame and finish. Good times ahead.  Richard Sum was expecting to deliver the next 30 units or so this week which means I should start clearing my workbench and buy some paint.  That and order me some stackable pin header samples :)

Friday, September 9, 2011

KAMKOP a very impressive tricopter

Found this beautiful tri-copter while prowling diydrones made by Peter Koppendorfer called KAMCOP.  It features 6x 350W motors and a custom carbon fiber shell with a transparent plastic dome in front with a pan-tilt camera.  Excellent design and professional finish. Envy!

Will serve as an inspiration if I ever get around to build one for my self.

Wednesday, September 7, 2011

Lots of nice build plans

Need plans? planes, tanks, ships, engines John-Tom seems to have a little bit of everything.  Bad ass Sherman and Tiger scale tanks with BB guns fitted amongst other things.  Will have revisit to prowl his magnificent collection of projects and plans.  Might a be interesting source of stuff to printing in 3D.

Thursday, September 1, 2011

How to paint my SUMPOD?


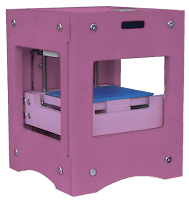
So while waiting for my SUMPOD someone asked for a template to try out different color variations before buying paint.  So did just that using Gimp. The result is a poor mans hack but it works.  You can pretty much just select the color of the base and carrier by coloring a couple of layers and it turned out pretty nice.

You can find the template here for gimp in .xcf format and a .psd export here I made but haven't tested at all.

Here you see a few examples I made using the template.

I seem to be favoring a blue unit with completely white interior, not just the surface carrier, unlike the picture shown here. The white will increase the visibility inside the build chamber to better see the details during a build.  I saw a TOM in action the other day where there where problem's with the feeder while using transparent plastic. Being able to clearly see what was being layered down seemed useful.

Edit: added a new layer for the inside of the template


Friday, August 26, 2011

When putting things in the blender

I started using Blender again this summer with surprising success. The new 2.5x layout and UI is much better IMO.  I just found this note about the keyboard layout and mouse theory for Blender.  I was actually trying to find a way to fix manifold problems in blender (water-tightness) after seeing people having issues with it on thingiverse.  That was when I found a tutorial from Shapeways cover exactly this issue.

Have a feeling this may prove useful.


Monday, August 22, 2011

PCB heatbed

Here is a very clever use of a PCB. You an buy them off the shelve and cut with a knife if you have to. I will probably use the SUMPOD itself to etch a PCB to make it all uniform an pretty. I can probably use an Pyrogel® XT Blanket (aerogel) underneath to direct the heat and hope fully lower power consumption.
A hot end I saw recently on thingiverse prompded the idea to use a aerogel thermal insulation to concentrate the heat and keep the exterior cool (as in not burning). Someone had even tried to use aerogel before and abandoned it. Will have to find a adequate seal to keep fine grained aerogel dust from the environment.

Wednesday, August 17, 2011

Wooden clocks, oh my!!

Clayton Boyer sure has been keeping himself busy designing interesting gizmos. He is selling design plans for some amazing clockwork based contraptions, including a few orrery designs. I'll have to secure my self one of these designs one day and try to print them. Or better yet cut it from wood. These constructions look gorgeous when built by the loving woodworker. And the mechanics are nothing short of spectacular.

How about a printable Orrery?

I just though of a wonderful project for my 3D printing adventures (still waiting for it).

I would love to build an orrery.

I found and excellent page discussing the construction of an orrery with diagrams, 3d sketches and even part numbers. These would serve as a great starting point to create a printable version.

Hakkavélin

Andri Mar told me about a local hacker group called Hakkavélin. They are currently in the process of building a pursa reprap. While I have hear of their existence I obviously didn't know a thing about their work. I'll have to make a point in checking them out and finding out if my endeavors have a place there. Meetings on Tuesday nights.

Tuesday, August 16, 2011

My consumables are here!

I got my consumables today. 4 spools of PLA and ABS plastics along with a couple of steppers and drivers. Some kapton tape too as it seems to be useful. The printer will be arriving soon. I shall have to prepare the shrine and get me some paint to make it look pretty. That entails picking a color : S What to do?

Tuesday, August 9, 2011

Waiting for my 3d printer

Can't wait to get my hands on my pretty Sumpod 3D printer I bought. Have been keeping myself busy dusting skeletons from my closet, playing around with OpenSCAD and sourcing some plastic to stuff into my 3D printer. Ended up buying from GRRF.de. It was the cost of shipping that was the deciding factor really, dropped all kinds of goodies in my basket while I was at it :P

So I did have a blog somewere

Second post after 4 years. Not bad. Can't claim to be an avid blogger. Well I got my old 'hoppy room' back after quite some years. Feels good to have some space for my projects and my self :) I'm currently working on my wheeled quadruped robot called Stikklar. A bioloids based robot inspired by a quadruped seen here by some Korean guy. Haven´t ever seen anything about that robot before or since. Pretty neat to say the least. I'll try to post some pictures.